How to transform a room with hardwood floors

We are about to transform a small bedroom. This week we sold a few pieces of furniture from his room on Facebook Marketplace to help clear out the space. We wouldn't be utilizing this furniture in the new design, so by selling it we can turn around and put that money right back into the room. Today I'm going to show you how to transform a room with hardwood floors and new baseboards.
What we're working with
Throughout our home we have original red oak hardwoods. So far we have sanded them down in our kitchen, dining room, hallway, our bedroom, and our daughter's bedroom. Our youngest son's room and our living room are the last and final rooms that need sanded. A few years ago we got a couple quotes for sanding down our hardwoods. The quotes ranged between 10-15k. Honestly, that was not in our budget, so we decided to tackle them ourselves. If you want to transform a small bedroom, just know you can do it on a budget!
Sanding down hardwoods
If you've never sanded down hardwoods before, you should definitely push that fear aside and jump right in. Once you get the hang out it, you'll feel confident enough to tackle an entire house. We prefer to rent the drum sander from The Home Depot tool rental. Also make sure you grab a course grit, and a fine grit piece of belt sandpaper.
Below I've included all of the materials we used to sand down the hardwood floors.
[show_shopthepost_widget id="4375494"]
Before photos
Transforming a small bedroom always starts with a handful of before photos. Below are what the bedroom looked like before.

By the way, there isn't a mattress on the bed because the kids like to camp out in the living room sometimes! As you can see the very orange floors are killing the neutral vibe we are envisioning. Like I mentioned above, both the bed and dresser were sold on Facebook Marketplace, which enabled us to easily clear out the entire space.
Removing the rock wall
Many moons ago we installed a rock wall in his closet. This was a great short term project, but the older he gets, the more we realize it doesn't get utilized on a daily basis. Removing the rock wall in the small reach in closet will allow us to put wardrobes in it's place. Below is a photo of the rock wall as I was removing the rocks.
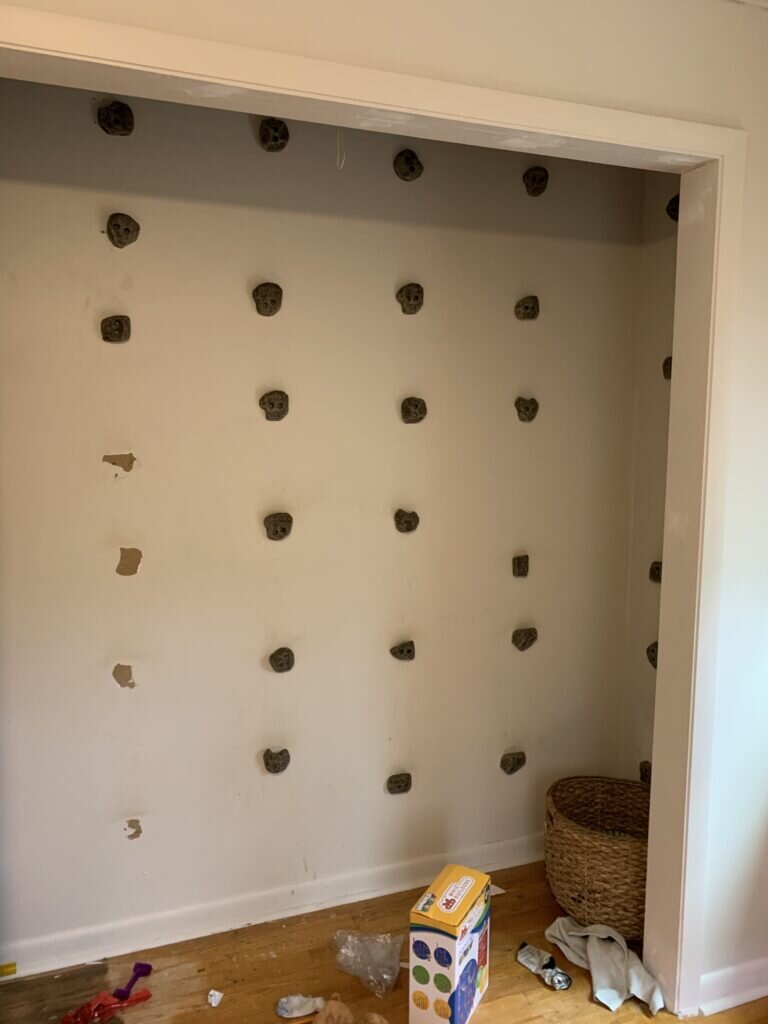
Here you'll also notice when I attempted to sand the closet with our circular sander with big dreams of doing it all by hand, literally. However, once we got those astronomical quotes, it was left like this for a couple years.
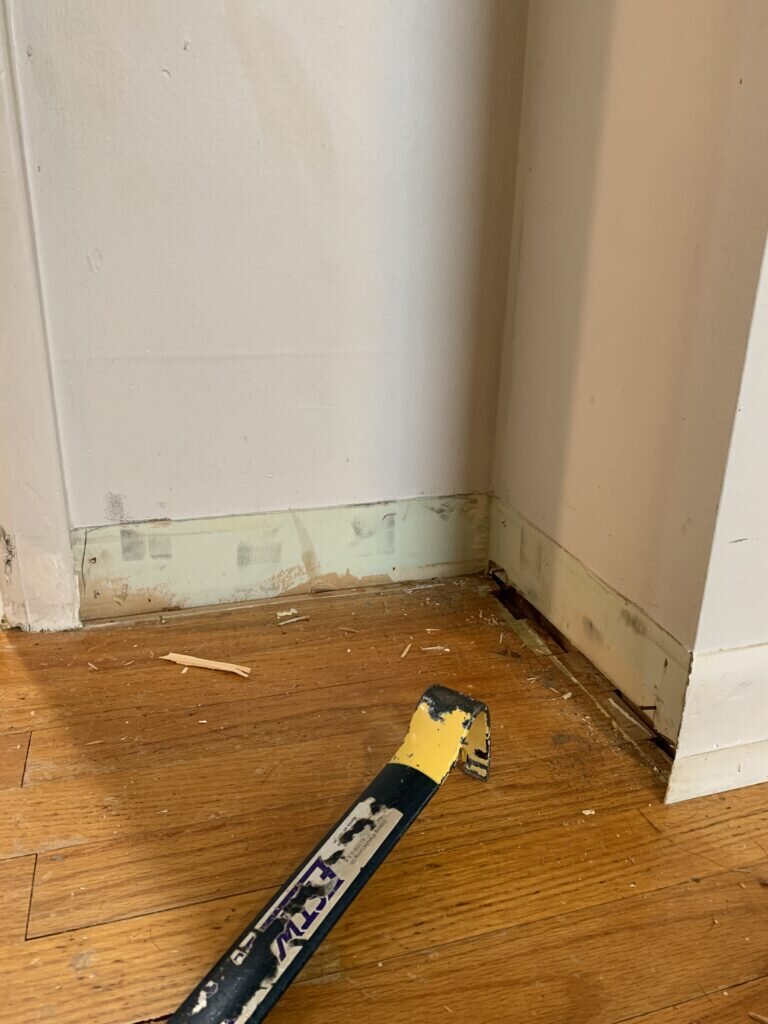
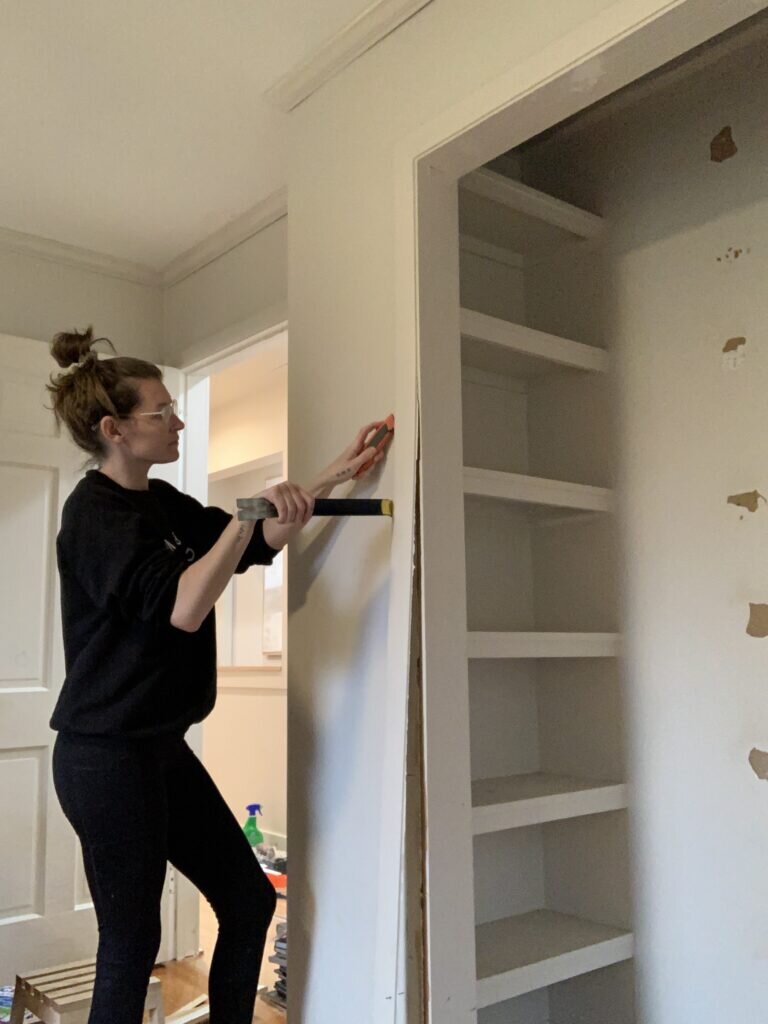
Trim removal
Finally, we were able to clear the entire room out so that we could start prepping for trim removal and sanding down the hardwoods. All of the trim was original to the house, and we've slowly been replacing as we go. Removing the trim before sanding allows us to get straight to work on installing the new trim. Avoiding all that debris is key to a smooth transition from sanded floors to trim install.
A few key tools you'll need to trim removal are a retractable utility knife, a hammer, and a crow bar. You'll use the retractable utility knife to break the caulk between the wall and the trim so you don't have any drywall damage. Then you'll use the crow bar to carefully remove the trim from the wall (making sure to place the crow bar where the existing nails are so that your tool doesn't go through the wall). Finally you can take your hammer to nail in all the nails around the perimeter.

[show_shopthepost_widget id="4375524"]
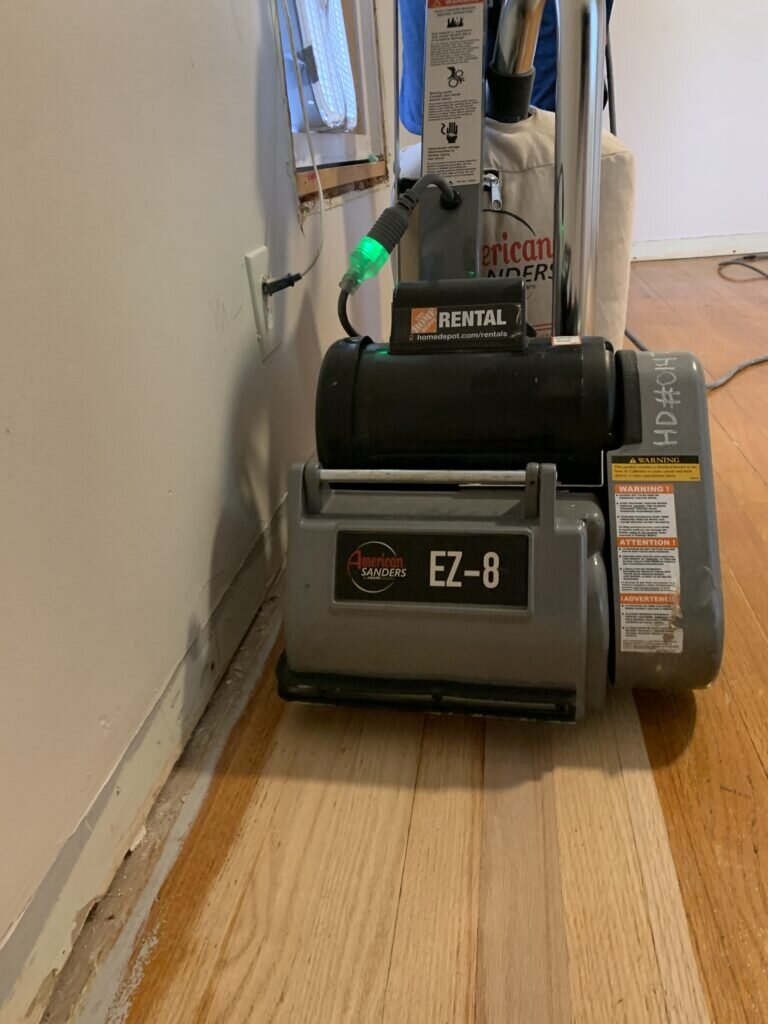
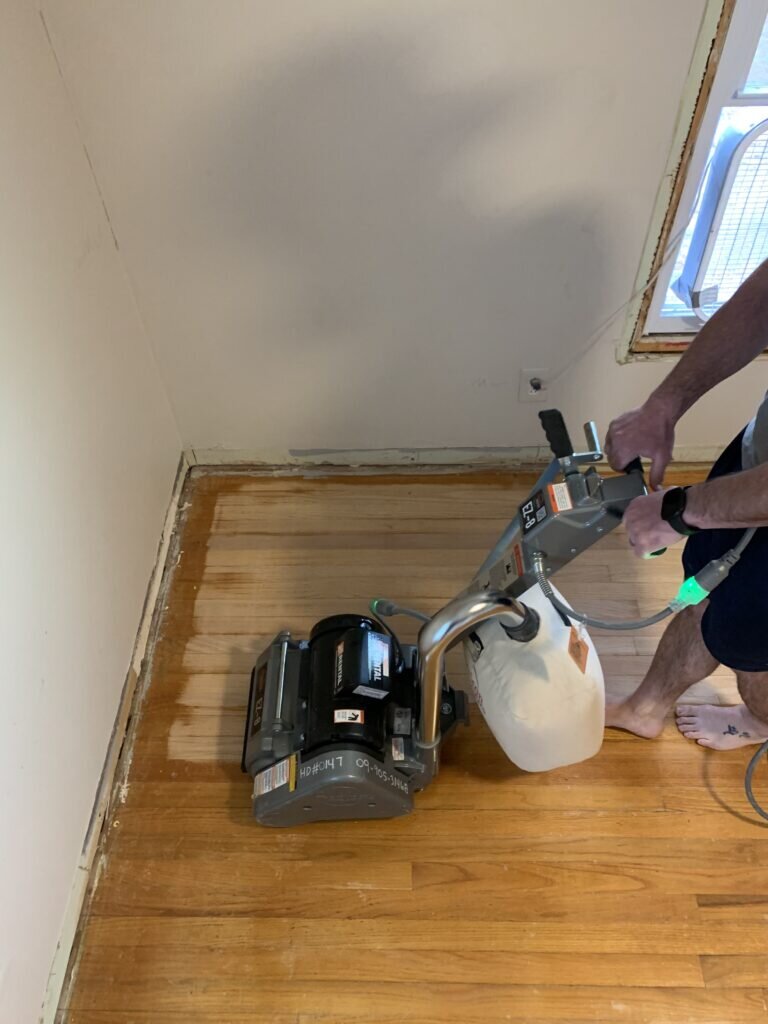
Sanding the hardwoods
After selling the furniture, clearing out the room, and removing all of the trim, it was finally time to sand the hardwoods. If you guys follow us on Instagram, then you've probably already seen the reel we created for this project. If not you can follow us here and watch the reel here! Here are a few photos I took while we were sanding.


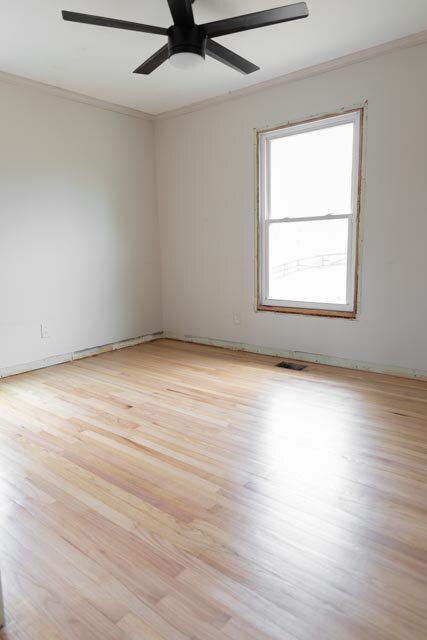
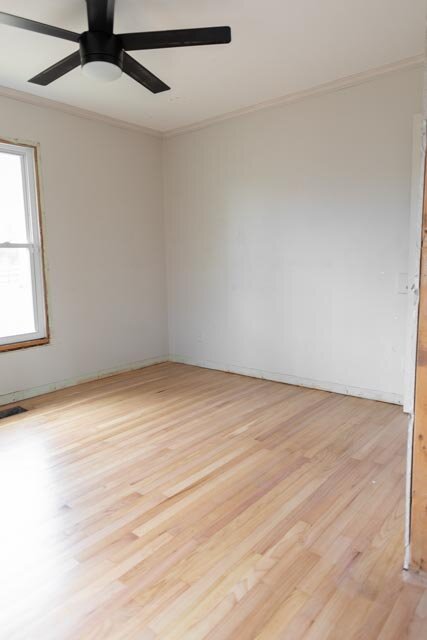
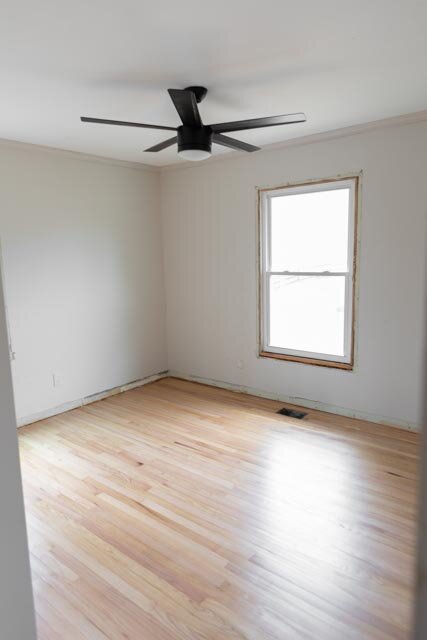
After photos
Here are the after photos of the hardwoods after we applied the polyurethane.


Next on our to-do list
We will start building the custom full size bed, along with a few other fun surprises. Make sure you subscribe so that you're notified everytime a post goes live. It will be sent directly to your inbox. It will also keep you updated on this transform a small bedroom process.
Follow on Instagram + Pinterest
Want even more behind the scenes? Make sure you're following us on Instagram and Pinterest! We share all of our reels and projects over on those platforms as well! Thanks for stopping by and checking out how to transform a room with hardwood floors and new baseboards! Save this project by pinning the graphic below.
![]()
[show_shopthepost_widget id="4375613"]