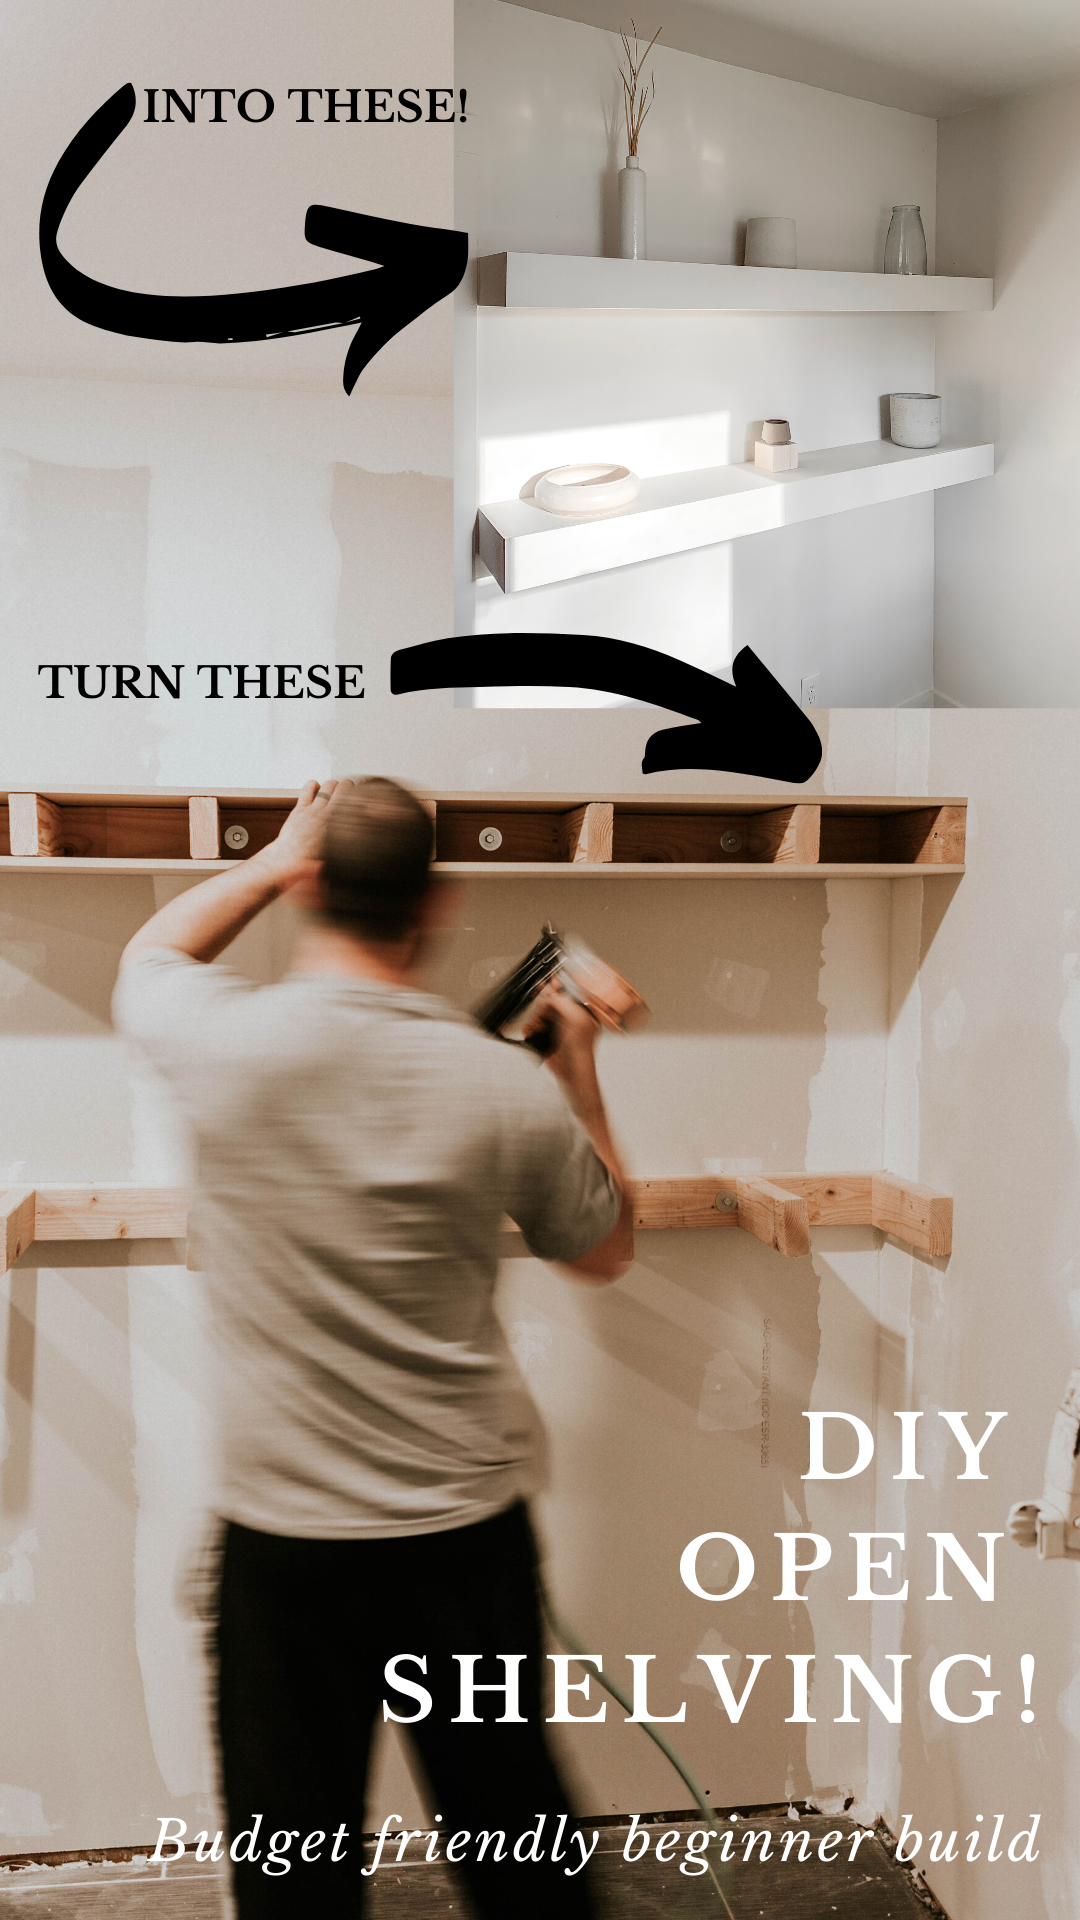
How to build floating shelves for your kitchen

I’ll be the first to admit that I am not personally a fan of any kind of open shelving. I do struggle with the constant dust that sits on top of everything that’s displayed. However, I also believe that open shelving, or in this case floating shelves can be absolutely stunning if done the right way. We have a more modern taste when it comes to interiors so I knew I didn’t want to deal with any of the “Instagram” bracket shelving. If that’s your thing, that’s’ perfectly fine, it just doesn’t work us!
This is an extremely easy tutorial for how to build floating shelves for your kitchen. The best part about this project is that it’s 100% completely custom to every home. All measurements are going to be different, which is why I didn’t include them in this post. You can add these floating shelves to any room/space in your home. They’re perfect in the kitchen to display your favorite pottery/vases (which is what I chose to do), but they’re also great for an entryway/long hallway! Literally they could go anywhere. The possibilities are endless.
Ok before we get started let me show you guys how I chose to style our kitchen floating shelves. I thrifted almost every piece for the exception of two.
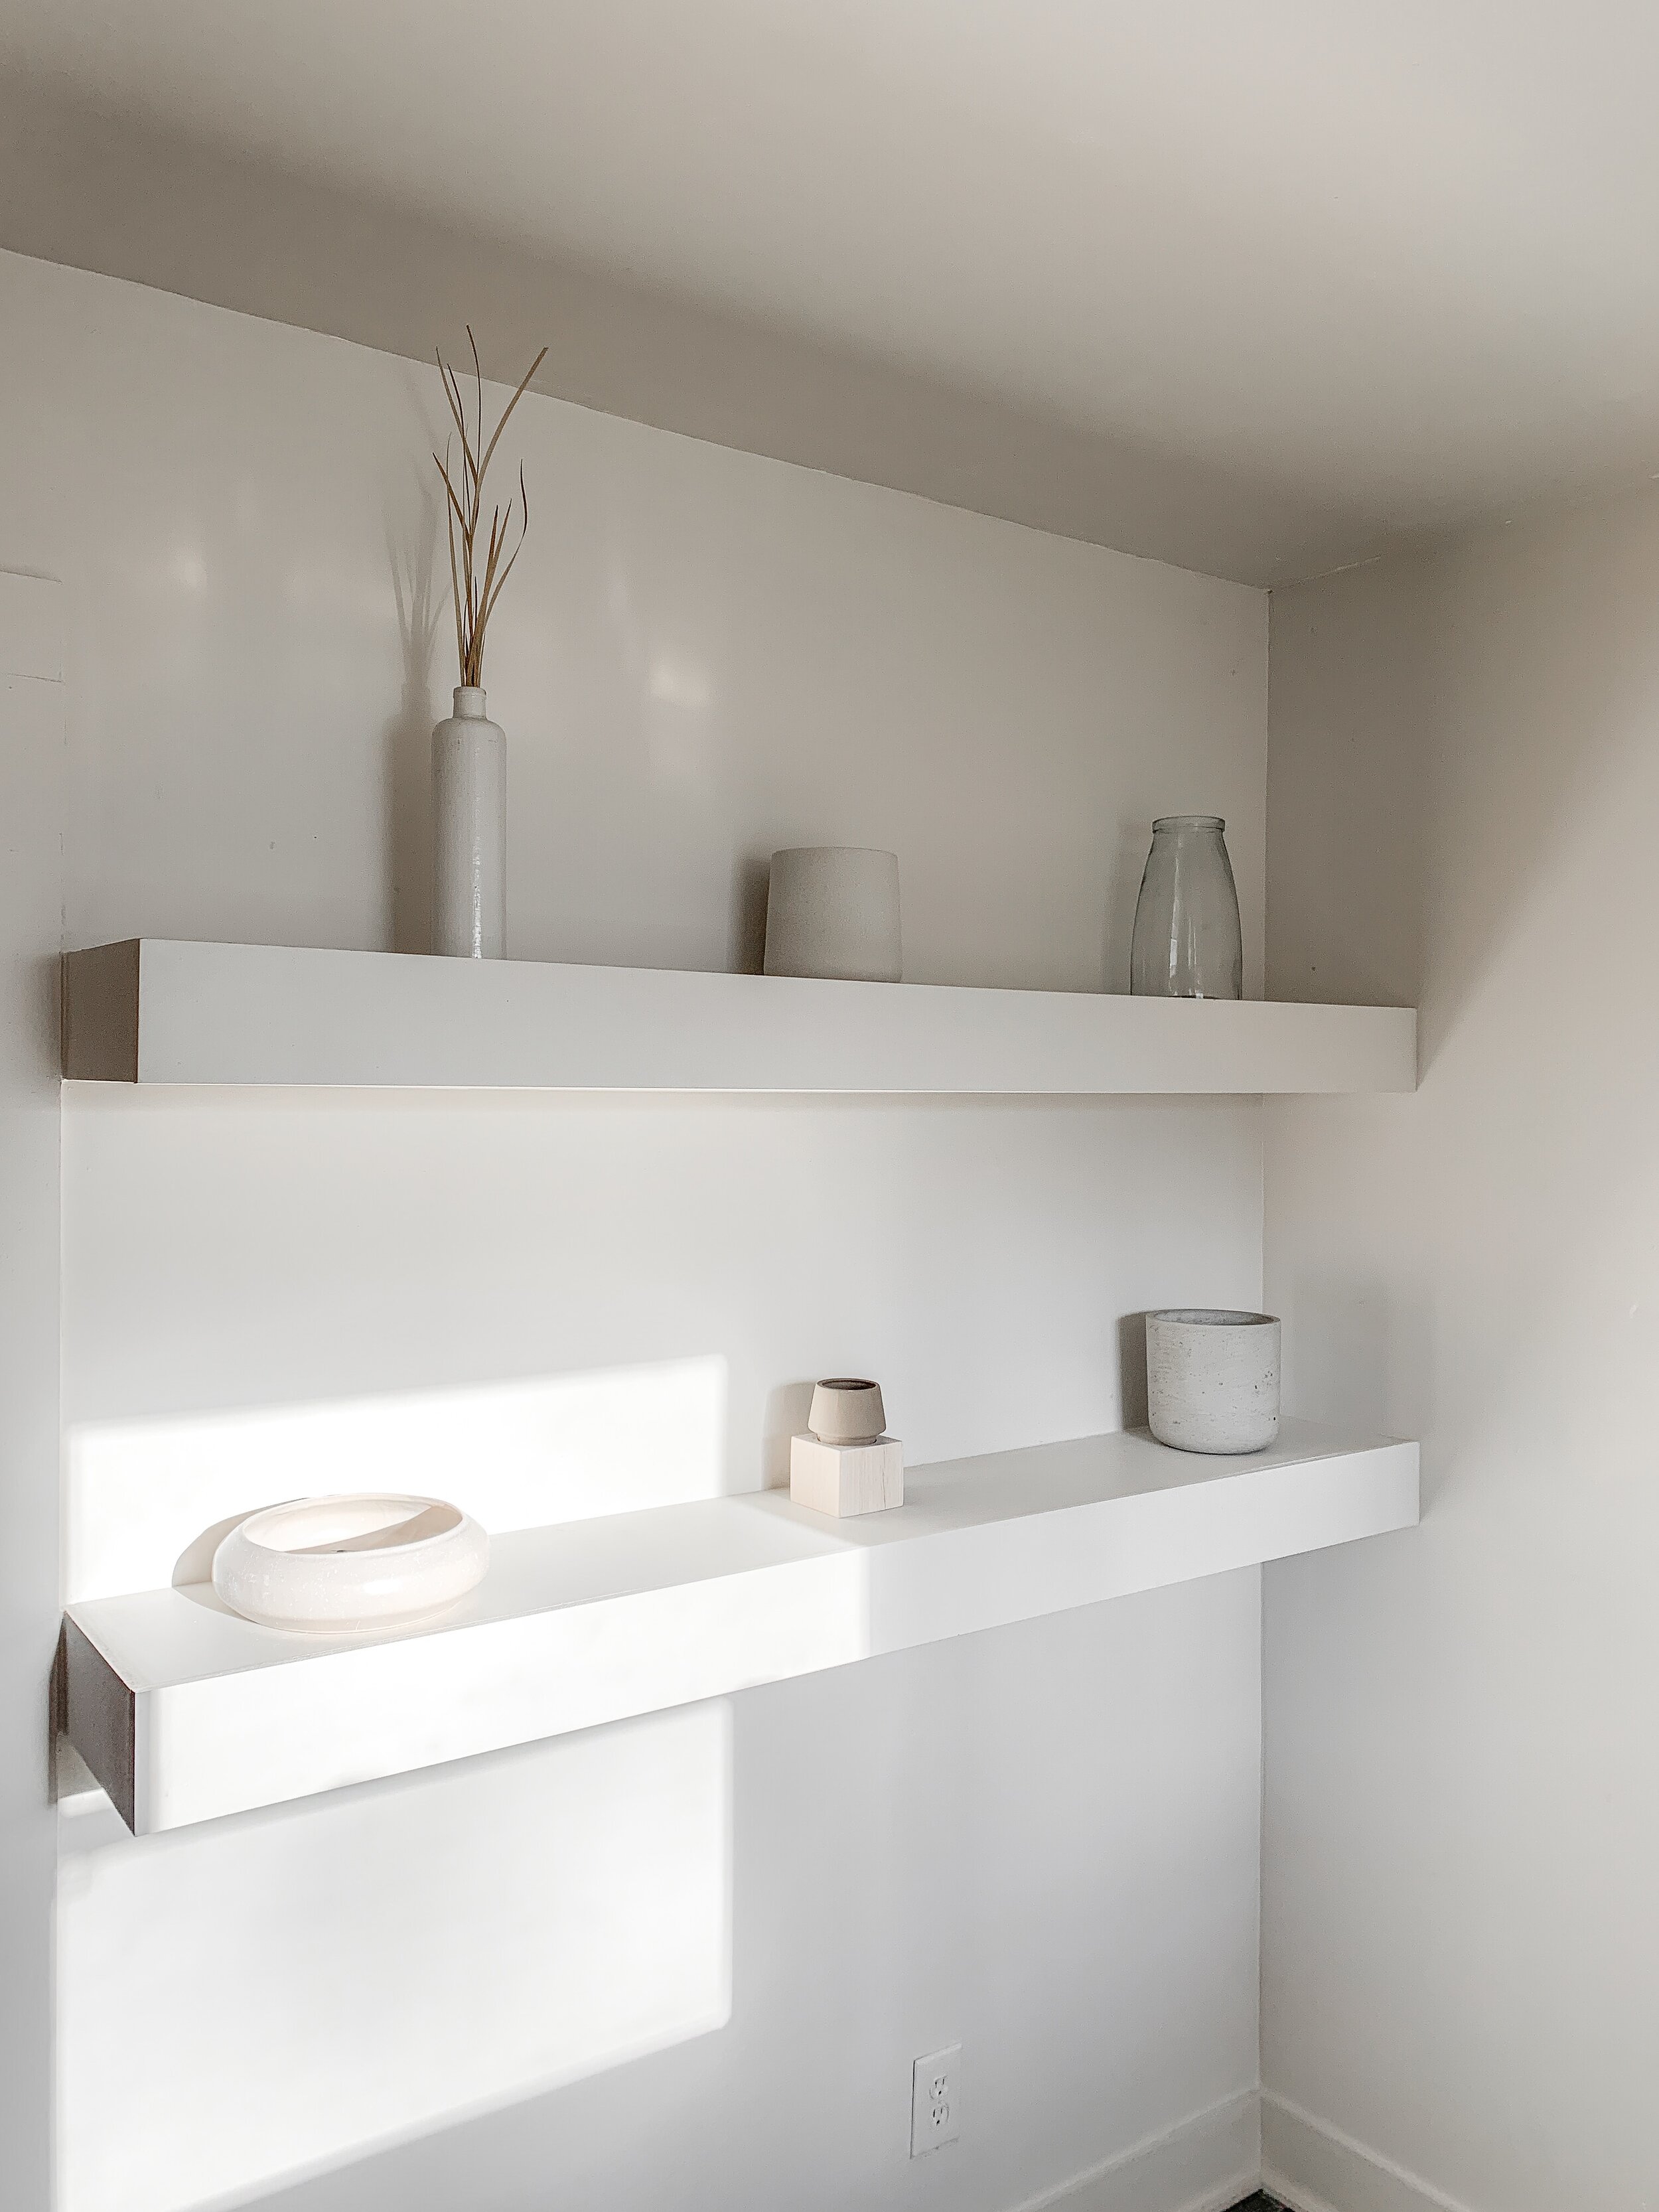
Aren’t those so calming and beautiful? I love when the sun hits them in the evening light! I’ve had these pieces on the floating shelves for a month or two, but don’t really see myself changing them out anytime soon because I think all of these pieces were meant for their spots.
Want to see how we achieved these EASY and AFFORDABLE floating shelves for our kitchen? We’ve included step by step photos below that you can easily follow! If you have any questions at all feel free to reach out to us via email at thisminimalhouse@gmail.com or come follow along and shoot us a DM on Instagram! Thanks so much for stopping by and checking out our DIY floating kitchen shelves today!
Want to know how we tackled this space/see progression photos? If you want to create these shelves for your own home all you’ll need are the following items:
2x4’s
bolts/screws (for securing into studs)
mdf (we used 1/2 in)
paint brush
paint
caulk
Easy Peasy! Here are the progression photos below!

We started these floating shelves directly on our drywall. We hadn’t committed on a paint color and weren’t really concerned with sanding once the shelves were in!

First we measured the wall. Once we knew the measurements we cut a 2x4 to length.

Before securing the 2x4 on the wall with bolts you’ll want to determine the depth of your floating shelves. Once you figure out your size preference glue and secure those from the back of the 2x4 (the part of the 2x4 that touches the wall). Once all of your 2x4 support beams for the shelf and secured, bolt the entire piece to the wall. Make sure you are securing the 2x4’s to the STUDS so it’s nice and sturdy.

We wanted two floating shelves in our kitchen, so we repeated the exact steps for the second shelf.

Once both supports are in you can start building the aesthetic of your floating shelves. We prefer working with MDF because of how smooth it looks when you’re finished, but you can use any kind of wood for this project! We cut and measure our MDF pieces and secured them to the tops and bottoms of our floating shelves.
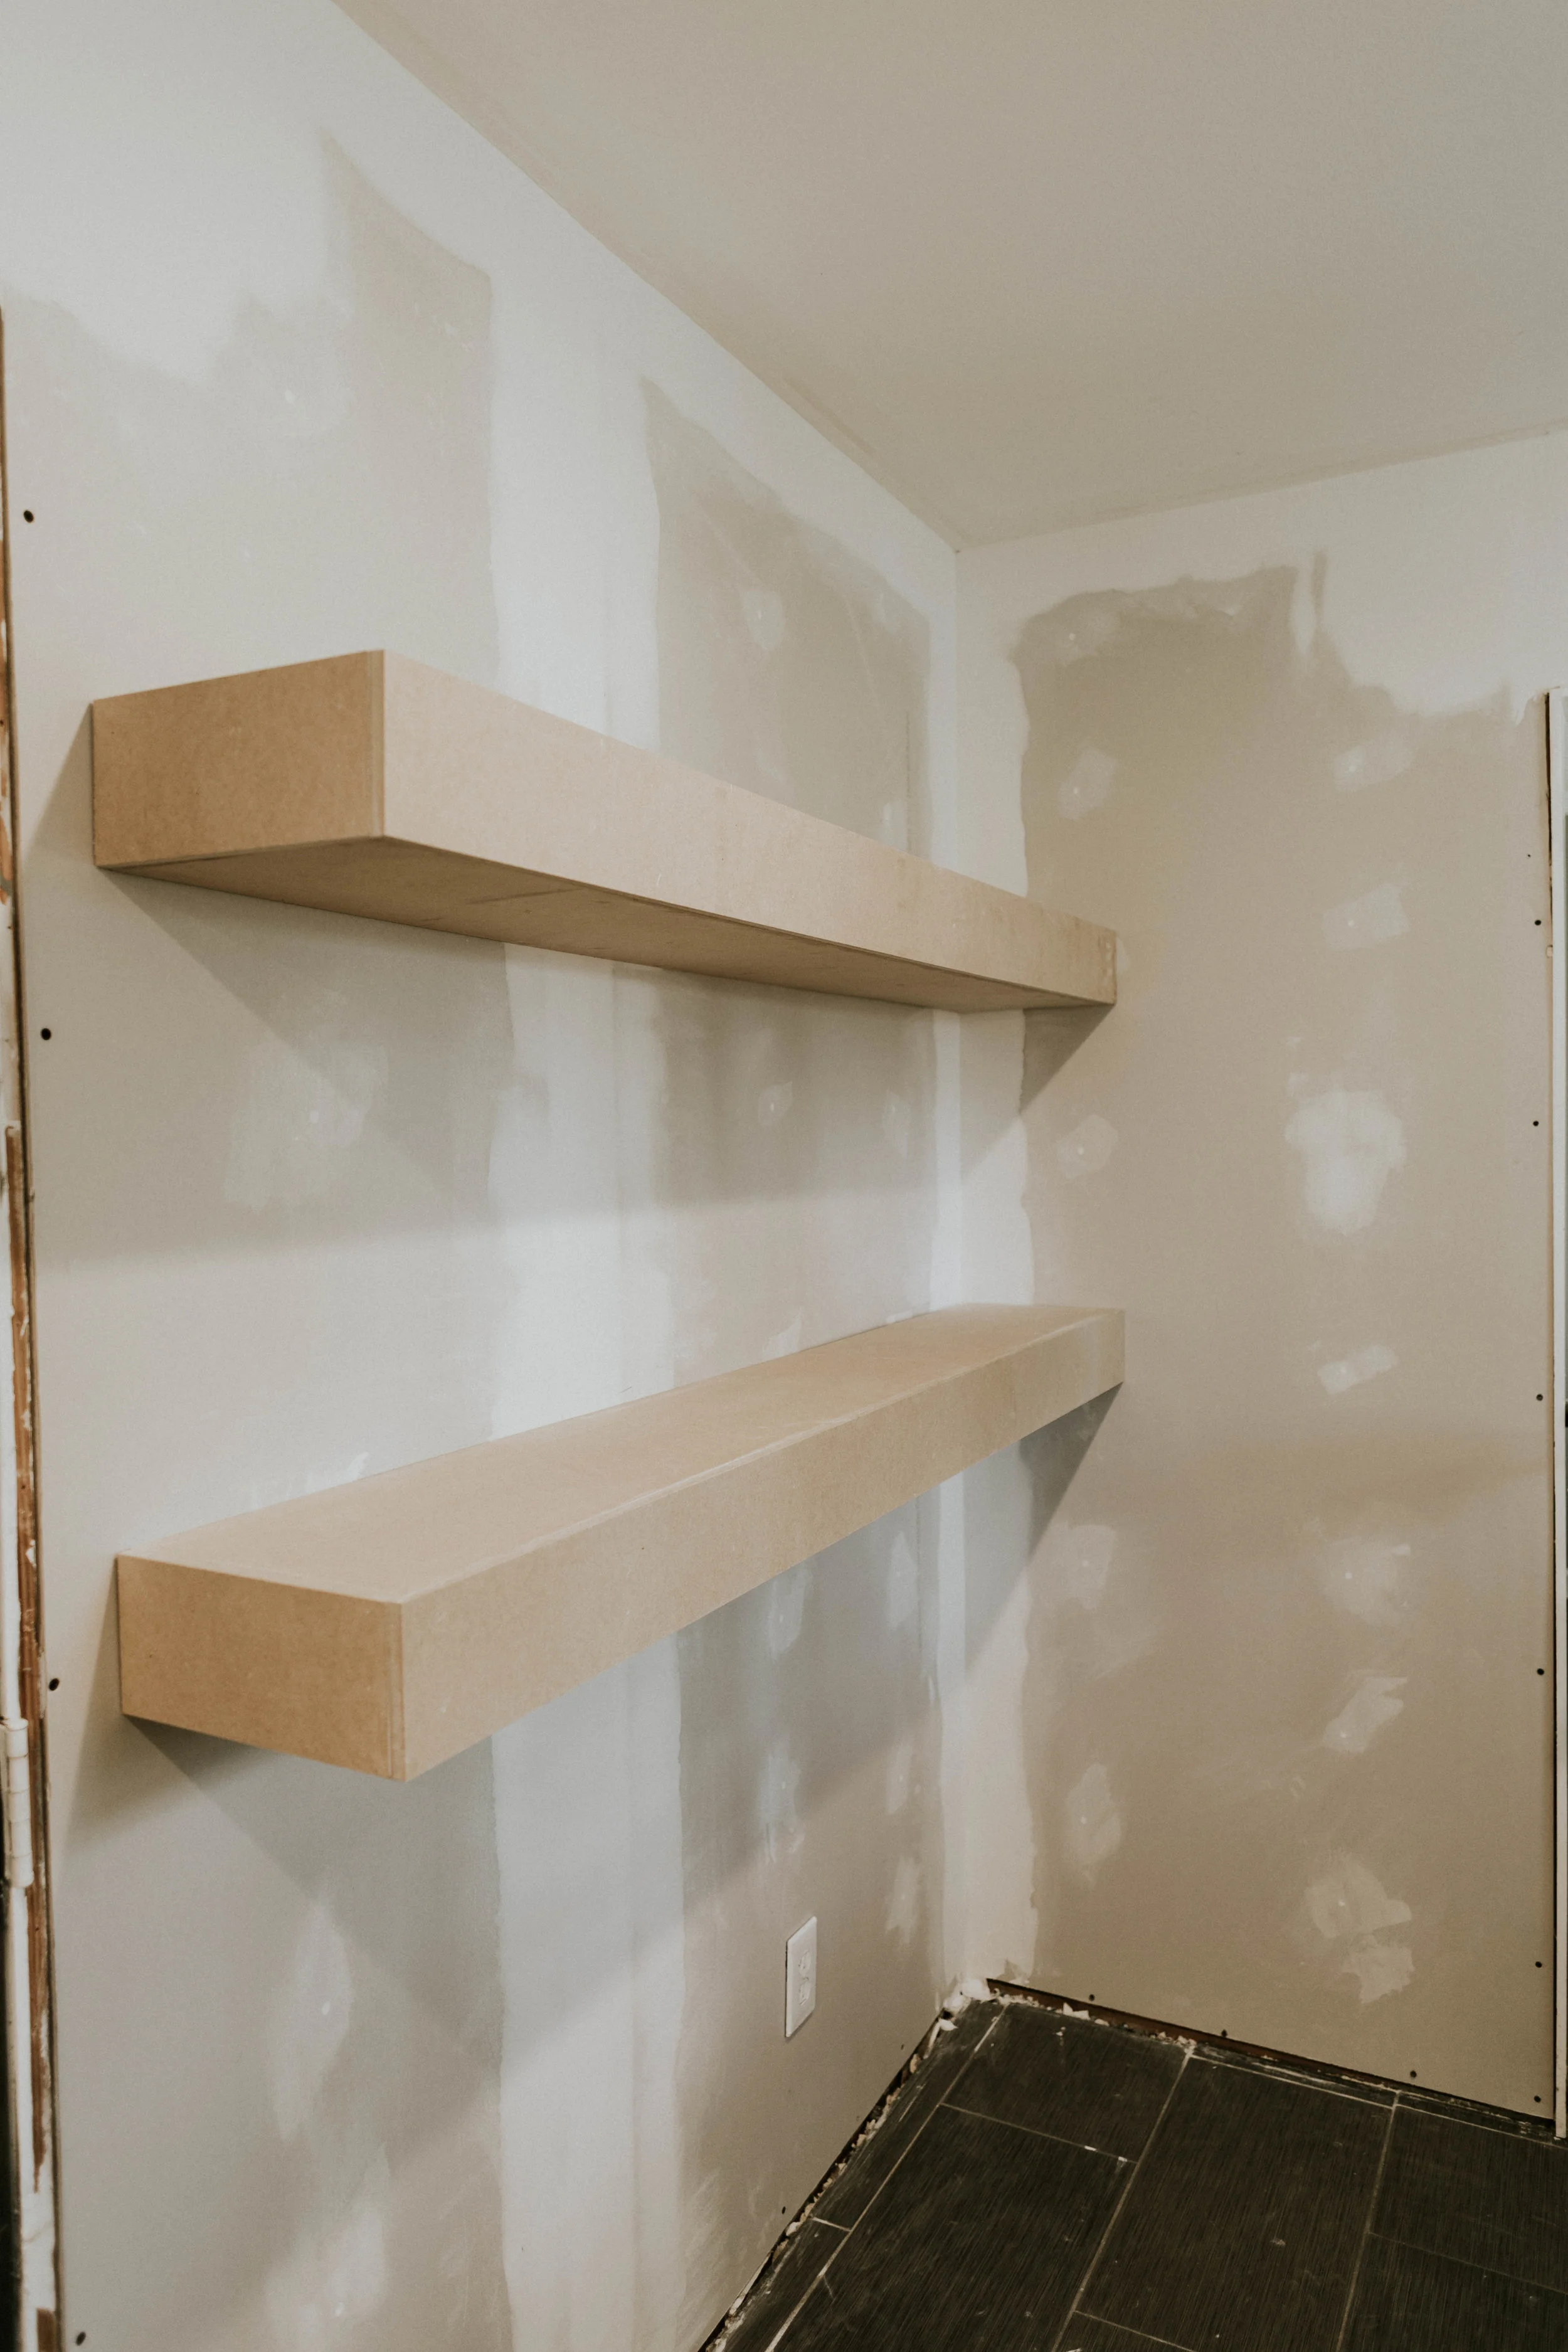
One the tops and bottom pieces are secured, you can add the MDF to the sides and fronts. We used a simple nail gun for this project. Once the shelves are finished, caulk any gaps you might have, and then apply your paint (or stain) to your new floating shelves!
THAT’S IT! Easy right? We hope this tutorial inspired you to build your own floating shelves in your home! If you happen to use this tutorial as your inspiration we would LOVE to know so we can share your project! Reach out via email at thisminimalhouse@gmail.com or come follow along and shoot us a DM on Instagram!