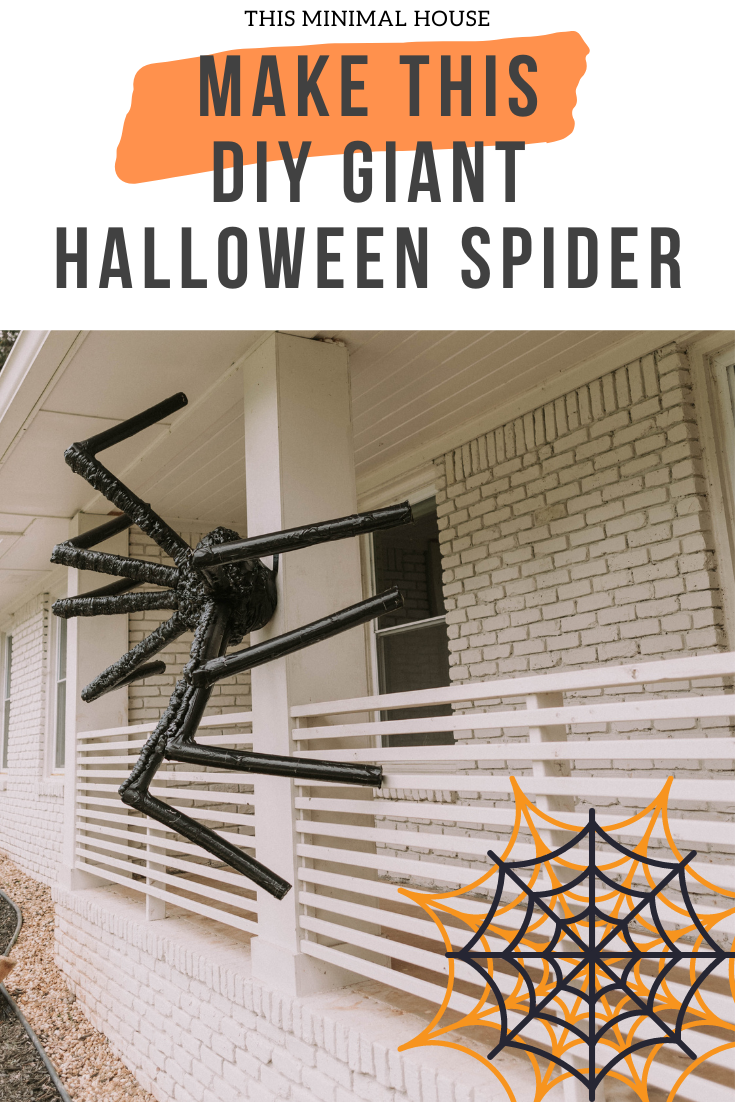
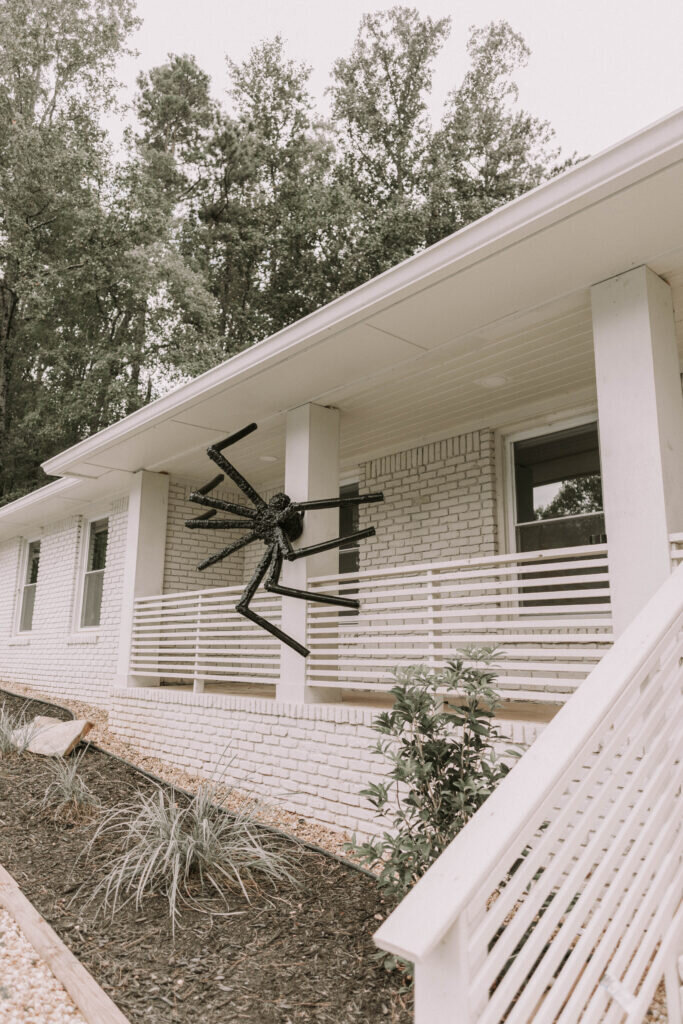
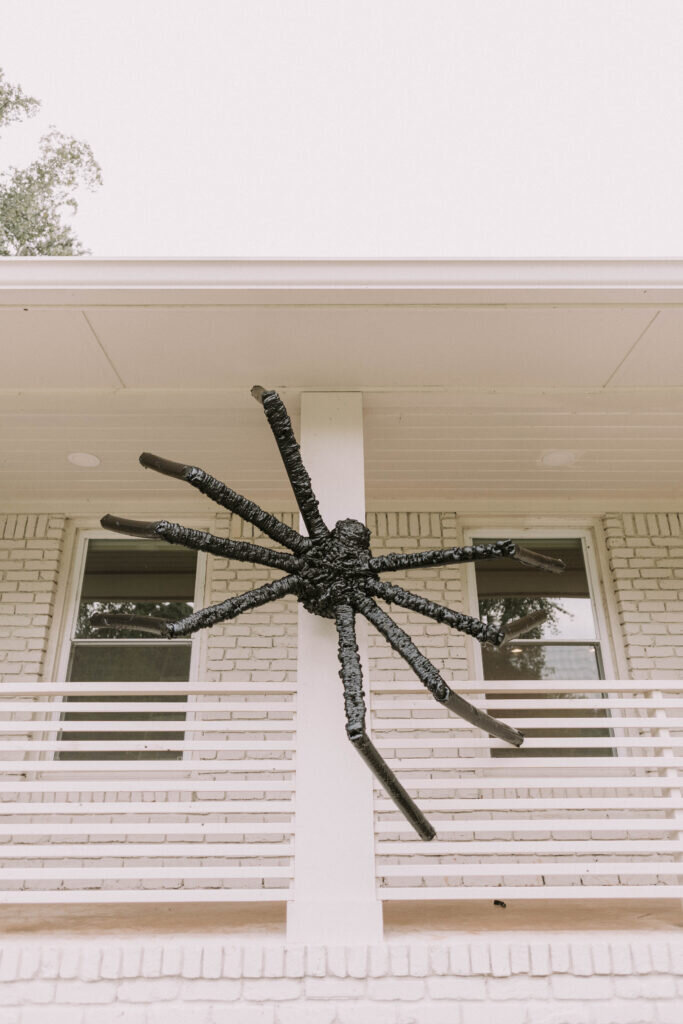
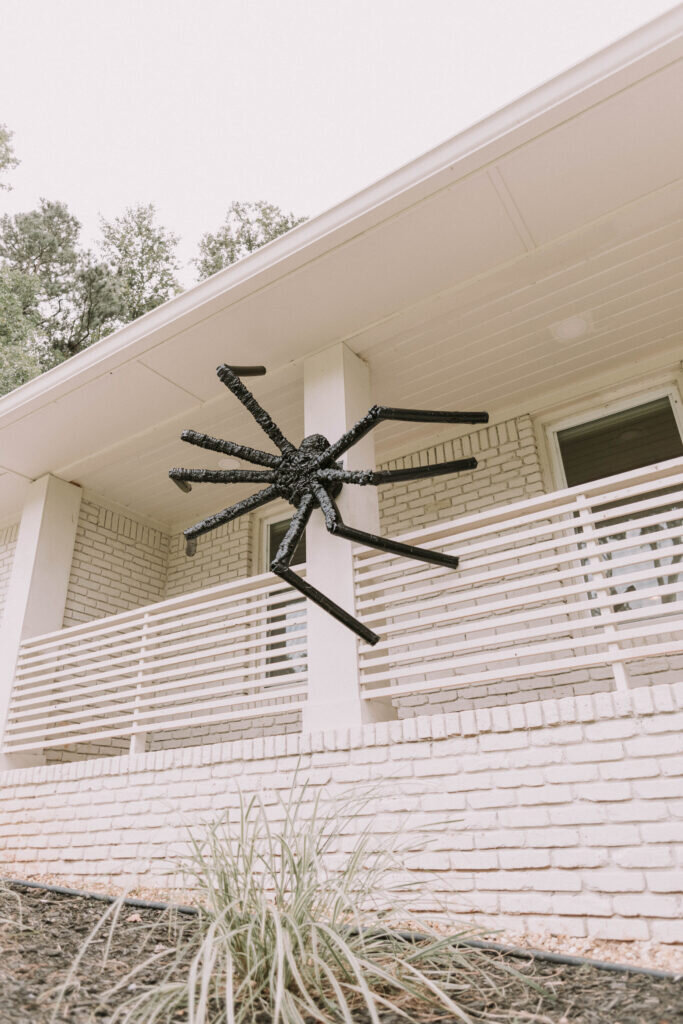
Giant DIY Halloween spider
It's almost October, and before we know it Halloween will be here! I am so excited that Halloween is finally on a Saturday this year! Being a minimalist, I'm not really pro-decorating for holidays. For many reasons, but the number one reason is storage. We don't have a large home by any means, and the little storage space we do have will not be occupied with holiday decor. However, today I caught the Halloween bug. I'm going to show you how I made a giant DIY Halloween spider for our front porch!
Want some more DIY projects? Check out our do it yourself bathroom shelf tutorial!
This DIY is really inexpensive and fun. In fact, I got 99% of the materials for it from The Dollar Tree! The rest of the materials were purchased at Home Depot! Do you love crafting? Get creative with The Dollar Tree arts and crafts supplies! Speaking of Halloween, any plans to throw a fun party? The Dollar Tree has all the party supplies you need for any occasion!
You won't even believe how simple this tutorial is! First let's go through the list of materials I used to create this giant DIY Halloween spider.
Materials:
Side note:
I showed a glue gun in both the beginning of the video and during the beginning of the video. However, now that I've made this spider, I would skip the hot glue gun because it didn't really help. The hot glue also didn't stick to the pool noodles. Now for the tutorial on how to make this giant DIY Halloween spider!
Tutorial:
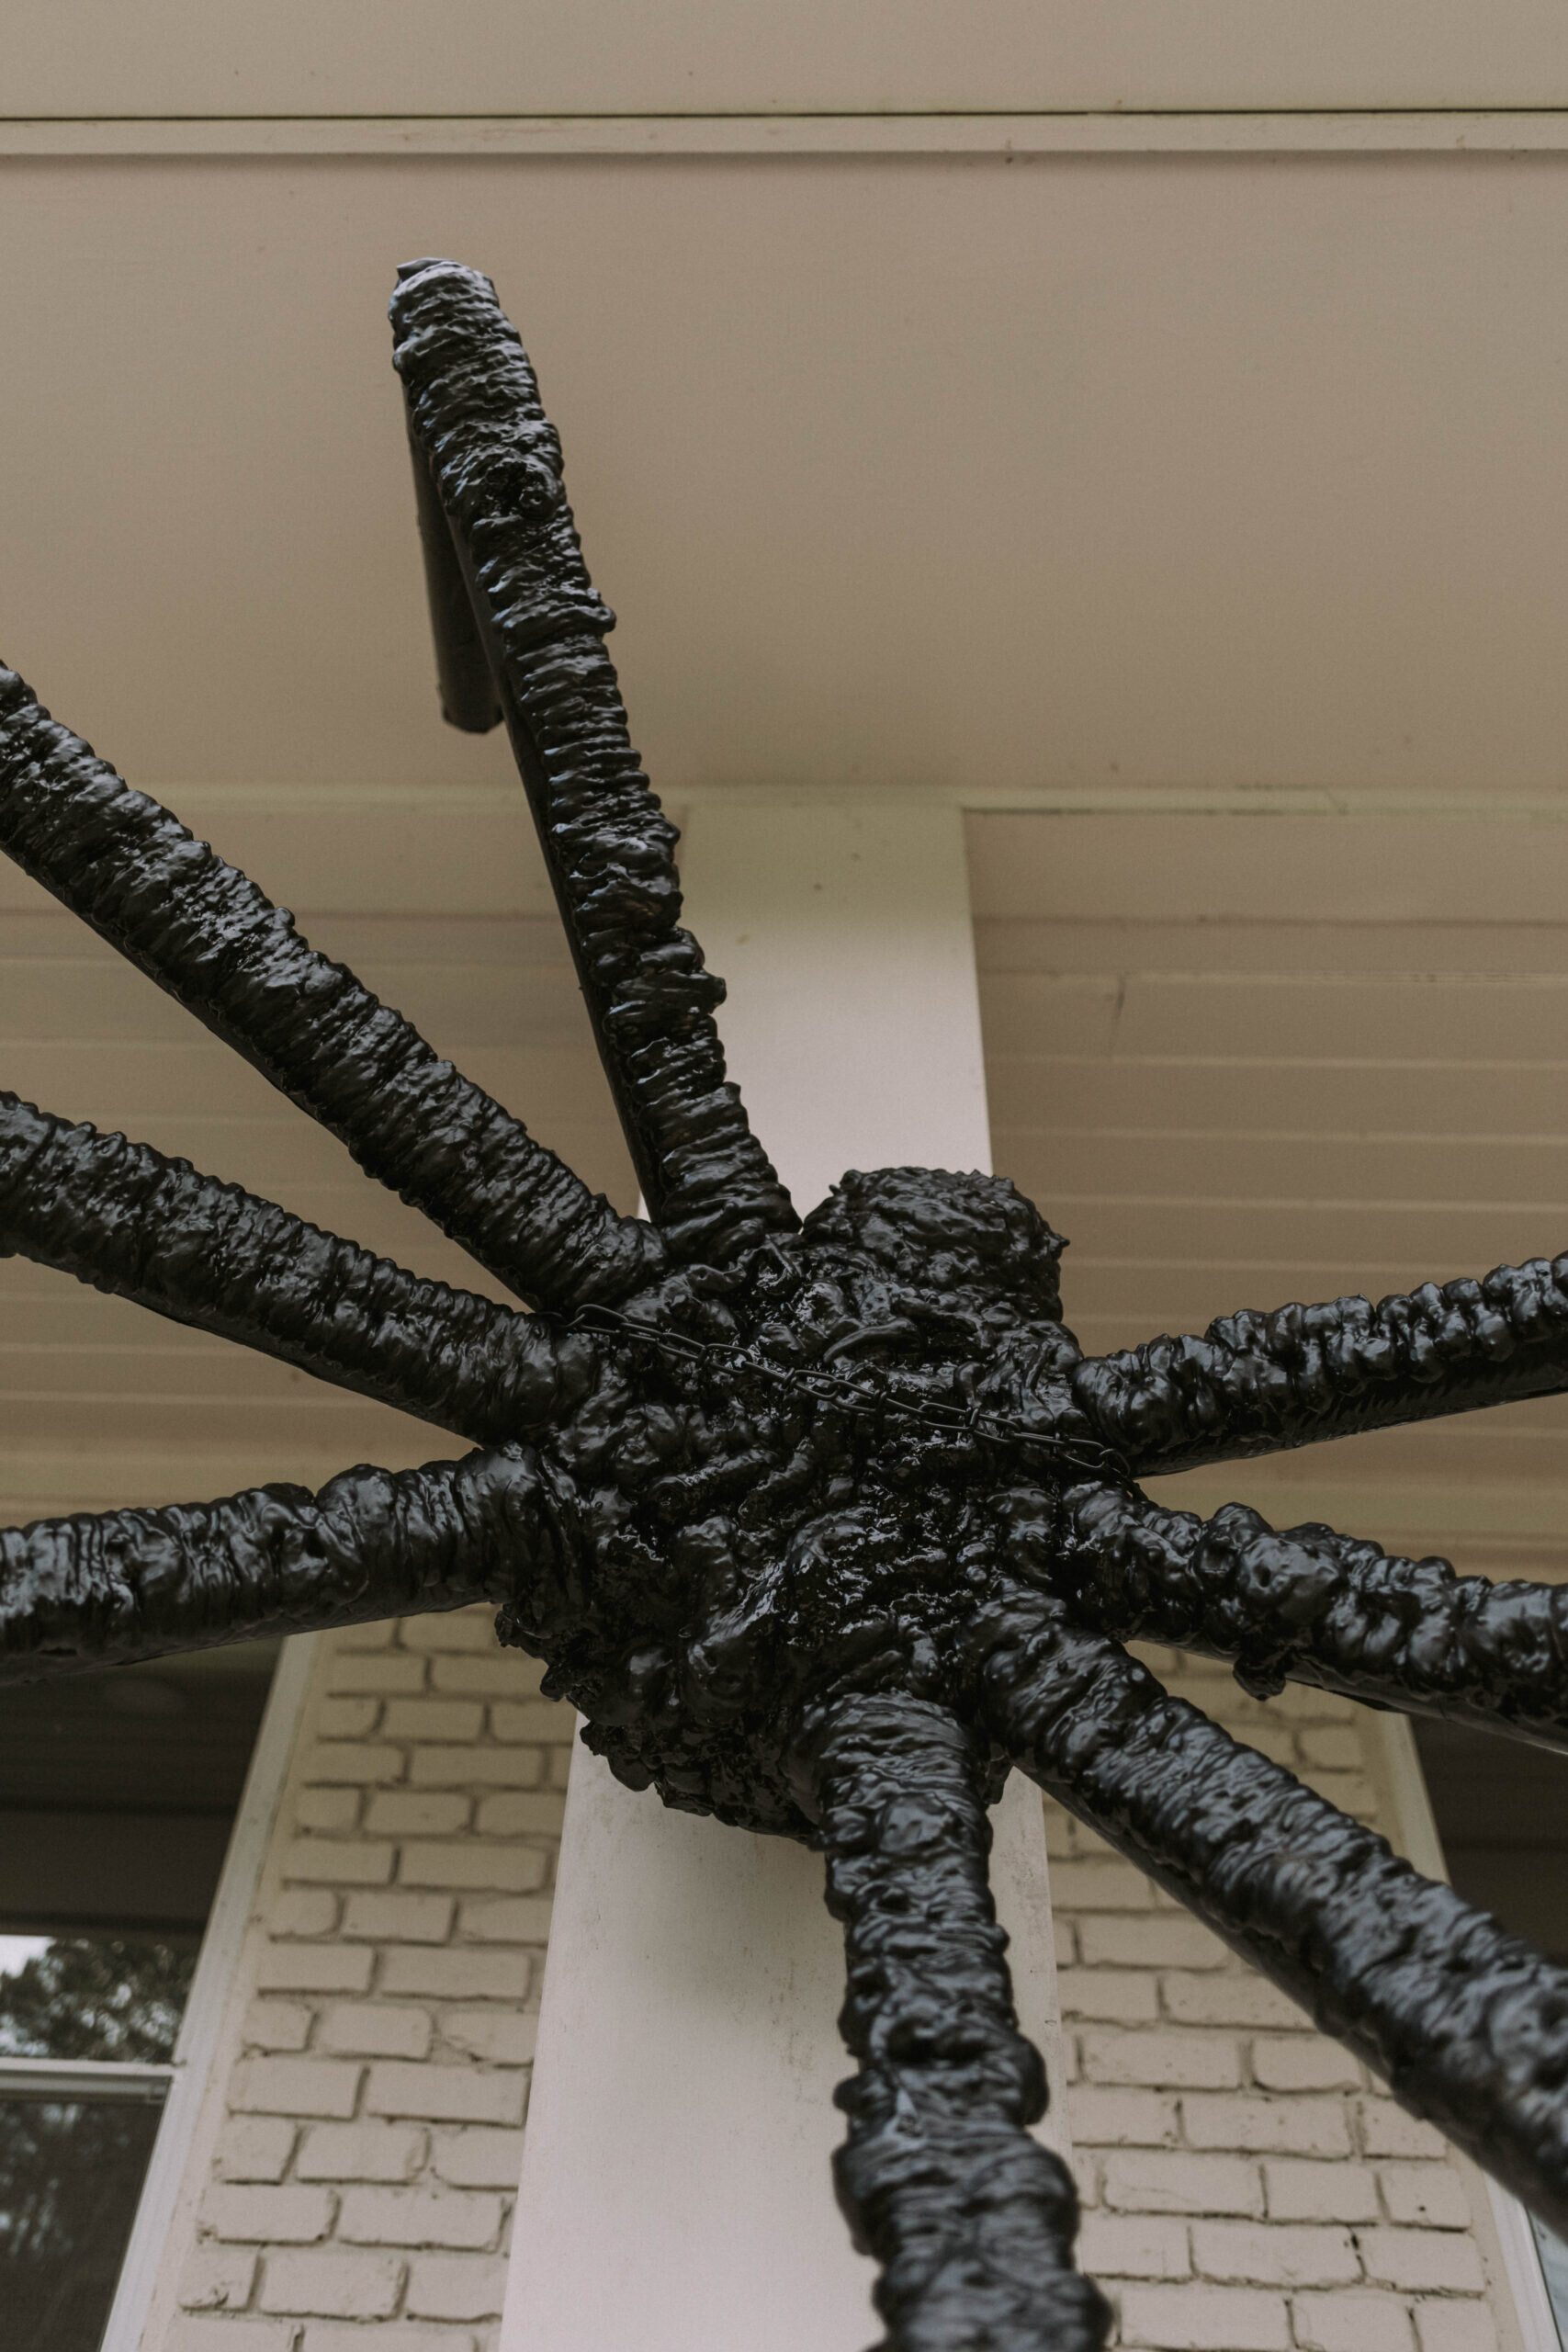
- To create this giant DIY Halloween spider you'll want to first grab your plastic bowls. I originally attempted to hot glue them together, which didn't work that great. Instead I used my duct tape to secure them. This method worked out perfectly.
- Now that you're two plastic bowls have been secured you'll want to spray paint them. My bowls were white, and my trash bags we're pretty transparent, so I decided to spray them black so you couldn't see them.
- While the plastic bowls dried, I grabbed some scissors and cut my pool noodles in half. Once they were cut in half, I angled them like spider legs and duct taped them together in the corners.
- I grabbed the dry plastic bowl and placed it inside the trash bag.
- Next I spun it around so that I could tie a knot in the bag as if I was taking out the trash.
- You'll notice you have excess trash bag. This excess will be your spider's head.
- Pretend like you're doing a messy top knot bun on your head and secure with a clear elastic.
For the rest of this tutorial please watch the provided Youtube video! Are you guys subscribed to our channel on Youtube? Our goal is to hit 100 subscribers this month, so we would love it if you hopped over there!
Video tutorial:
https://youtu.be/KjNbZsatgVs

Thanks for much for stopping by and checking out our giant DIY Halloween spider tutorial! If you recreate this project, we'd love to share! Send it over to us on Instagram!
Make sure you save this project for later! Pin the graphics we created below to your Pinterest boards!