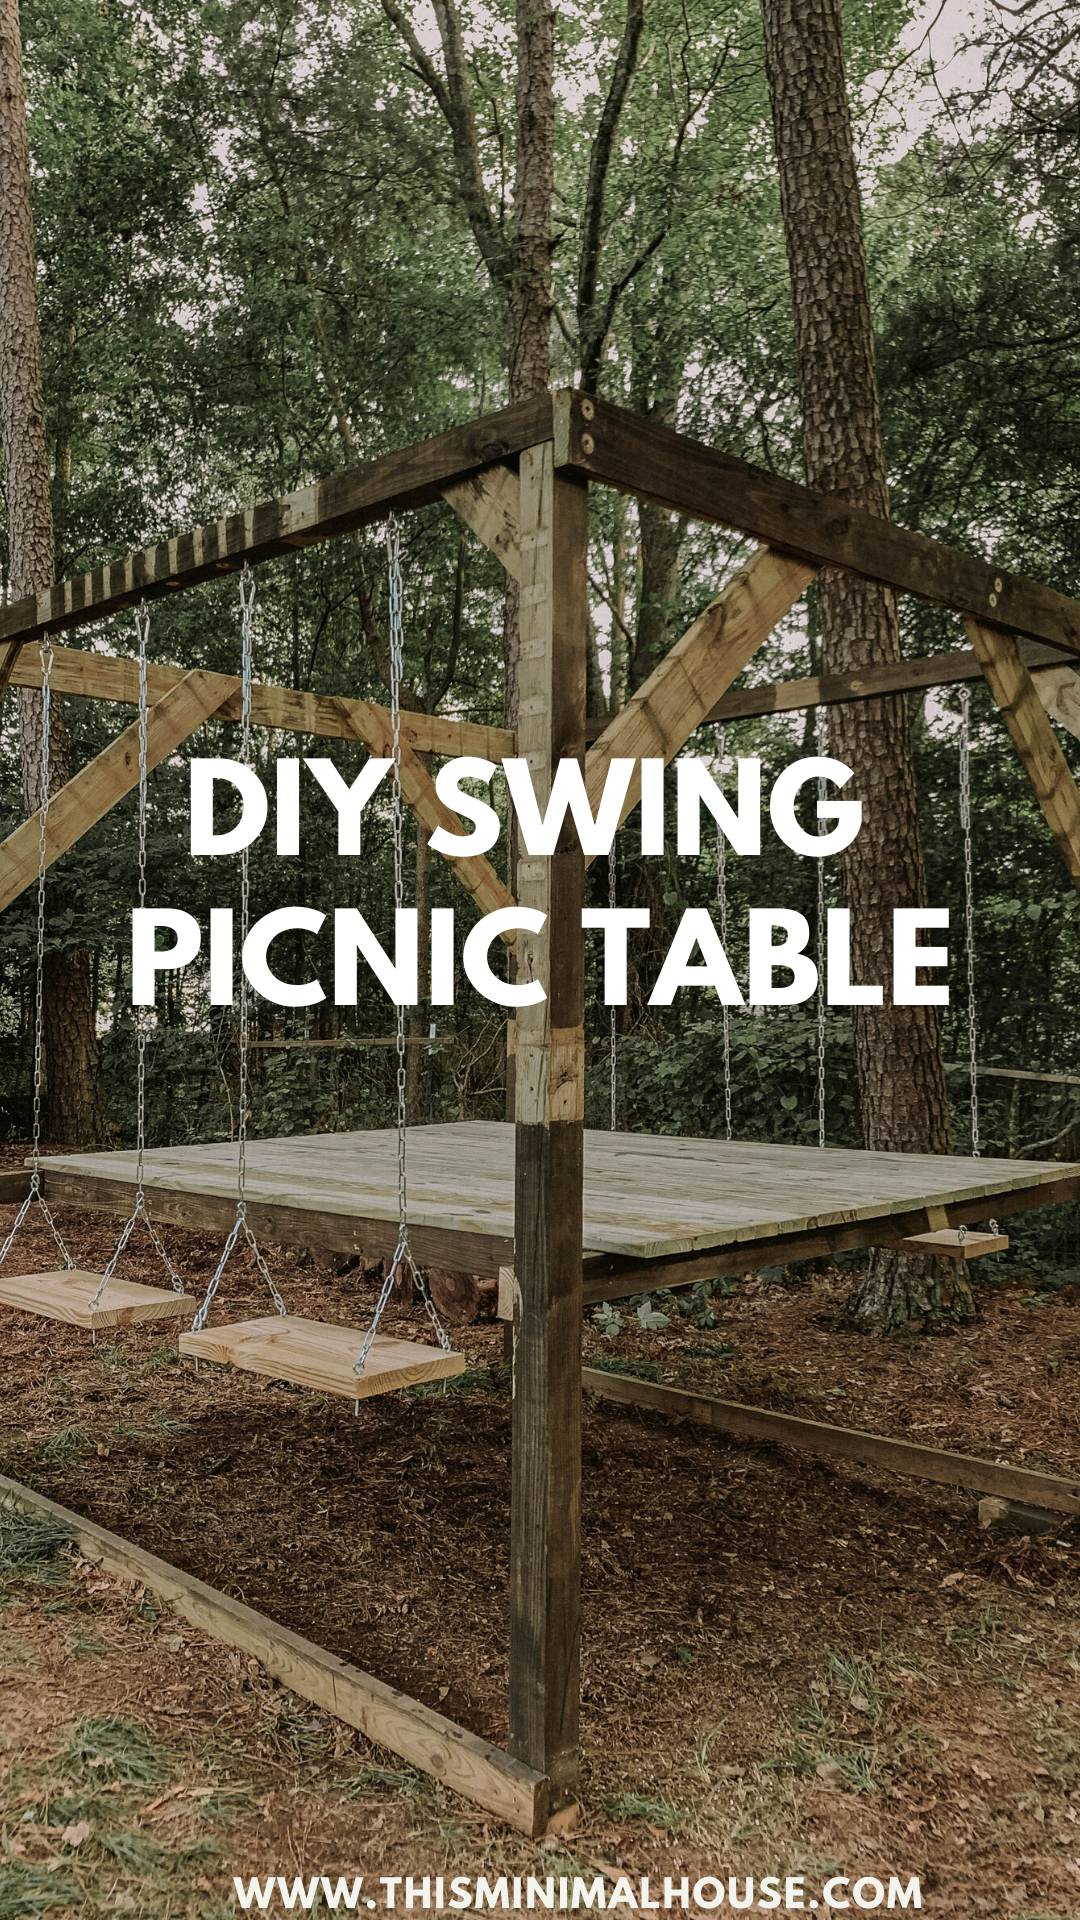
DIY swing picnic table
Hey guys! Today I’m going to be sharing how we built our DIY swing picnic table out of the kids old DIY playset we built a few years ago! We recently moved the playset because of a future walkway we were going to install that leads to our new shed. In doing that we had to take apart the playset and move it to a new spot in the backyard. The playset sat there for a few weekends while we worked on other projects.
I was inspired to transform it into something completely different, and we’re thrilled how it turned out. We love sitting around the firepit with the kids during the week and on the weekends. However sometimes they want to have their own space. We also needed an area where they could eat food without dogs bothering them. Our youngest were really sad to be losing their swings, so we knew we wanted to incorporate those into the building plans until we reinstall their other swings in their new location.
Adding the swings to our DIY picnic table was the greatest addition. The kids love them, we love them, and they add so much to this build. Today I’ll be sharing the entire process in the form of photos. Then I’ll be posting a separate blog post that will be a detailed build drawing including materials and measurements!
We hope you guys enjoy, and are inspired to build your own DIY swing picnic table for either you and your spouse, because this is a great build for adults, or for your children to enjoy in your backyard!
Let’s get started shall we!
We started with the existing DIY playset. We knew the easiest thing to do would be to essentially reuse this and just recreate. We started by removing the side supports.


We used our grinder to remove any bolts that had been bent and wouldn’t come out smoothly, that way we could still re use the wood and not have to toss it.


One we removed the bent bolts, we removed the entire old floor to the playset.

Doing this would give us our base for our DIY swing picnic table. Using this frame made it easier to achieve the look we wanted.

Because of it’s size, and the fact that we were adding swings, we wanted to make sure it was extremely stable. We did this by reusing the deck boards and cutting corner angle supports.

Here’s how the frame looked once the corner angle supports were installed.

We added smaller corner supports on the sides where the swings were going to be installed. Adding these supports to all four sides significantly helped with stability!

Next we added support on the sides of the picnic table so that we could start framing for the table.

We attached and then came back through and cut! We added the back support solely for leveling purposes. The side supports will only sit on the left and ride side of the table.

Next we measured our boards to begin framing for the picnic table pieces.

After framing the picnic table portion, we measured the top of the frame so that we could install our eye bolts.


Once we wrapped up the table support beams, we could move on to installing the table top of the picnic table. We did this with treated deck boards.


After all the table top boards were secured, we went back through and trimmed them so they were all level.


Next we got to work on the swing seats. Originally we attempted smaller seats, but we weren’t happy with them. I ran to Home Depot and grabbed an 8 ft

Here’s how the DIY swing picnic table looked once it was all put together and assembled!


ISN’T THAT AMAZING? We have been sharing alot of behind the scenes footage of this build on our Instagram! Are you guys following us on Instagram? If not what are you waiting for? Click the button below to follow!
Speaking of social media? Are you guys following along on our second favorite outlet, Pinterest?? We love sharing our DIY projects over there, including what’s inspiring us! Click the button below to come hang out with us over there!
We created these fun graphics for you guys in case you wanted to save this DIY project for later!! We would love for you to pin them to your boards!